This is a Morse keyer that can receive characters from your phone over Bluetooth. It then translates the received text into Morse code and keys the transmitter. It can also process a number of simple commands; for example: change (or just report) the CW speed, stop the ongoing transmission, repeat the last transmission etc. The generic serial terminal app is actually quite adequate for this purpose, so QSOs flow easily even if the operator is not young, i.e. cannot type very quickly on the phone keypad. The Android terminal app cannot produce a proper QSO log, but it can save all the transmissions to a file as they are output, together with timestamps, call signs etc. The device is battery operated and fun to use. It can also work as a normal keyer, with a paddle.
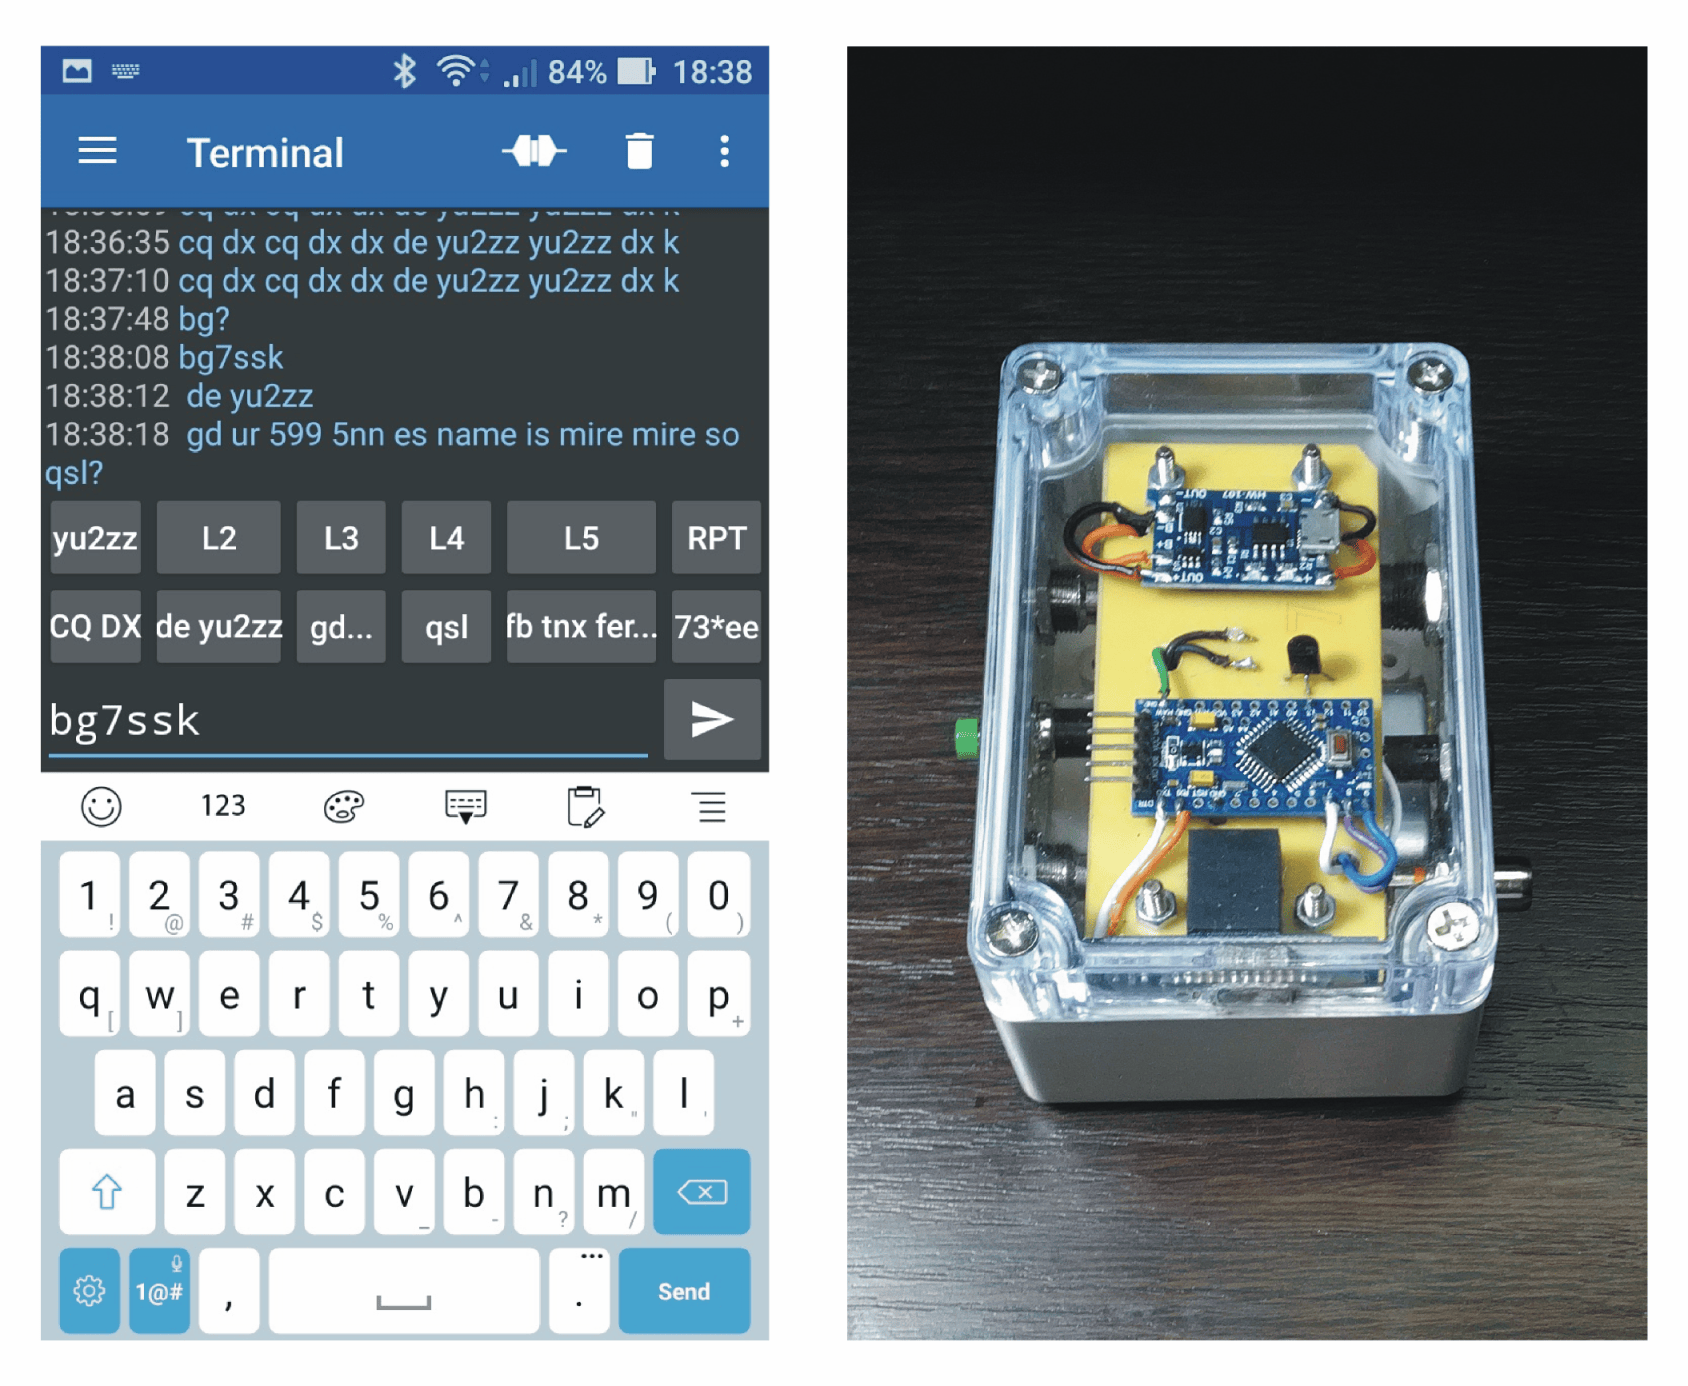

This was an enjoyable weekend experiment. Who knows, it might even have a practical use in portable operations.


In the terminal app, the device (this keyer) is selected for connection only once. From then on the connection is made with one touch.
The keyer converts letters, numbers, spaces and five basic punctuation marks received from the phone into Morse code. You can use lowercase or uppercase, it doesn’t matter. It can also produce the prosigns SK, AS and AR (received as: asterisk, left parenthesis, right parenthesis, respectively).
The serial terminal app cannot keep a real QSO log, but it can continuously record the content of the communication in a text file from which it is easy to extract times, call signs and other data later.
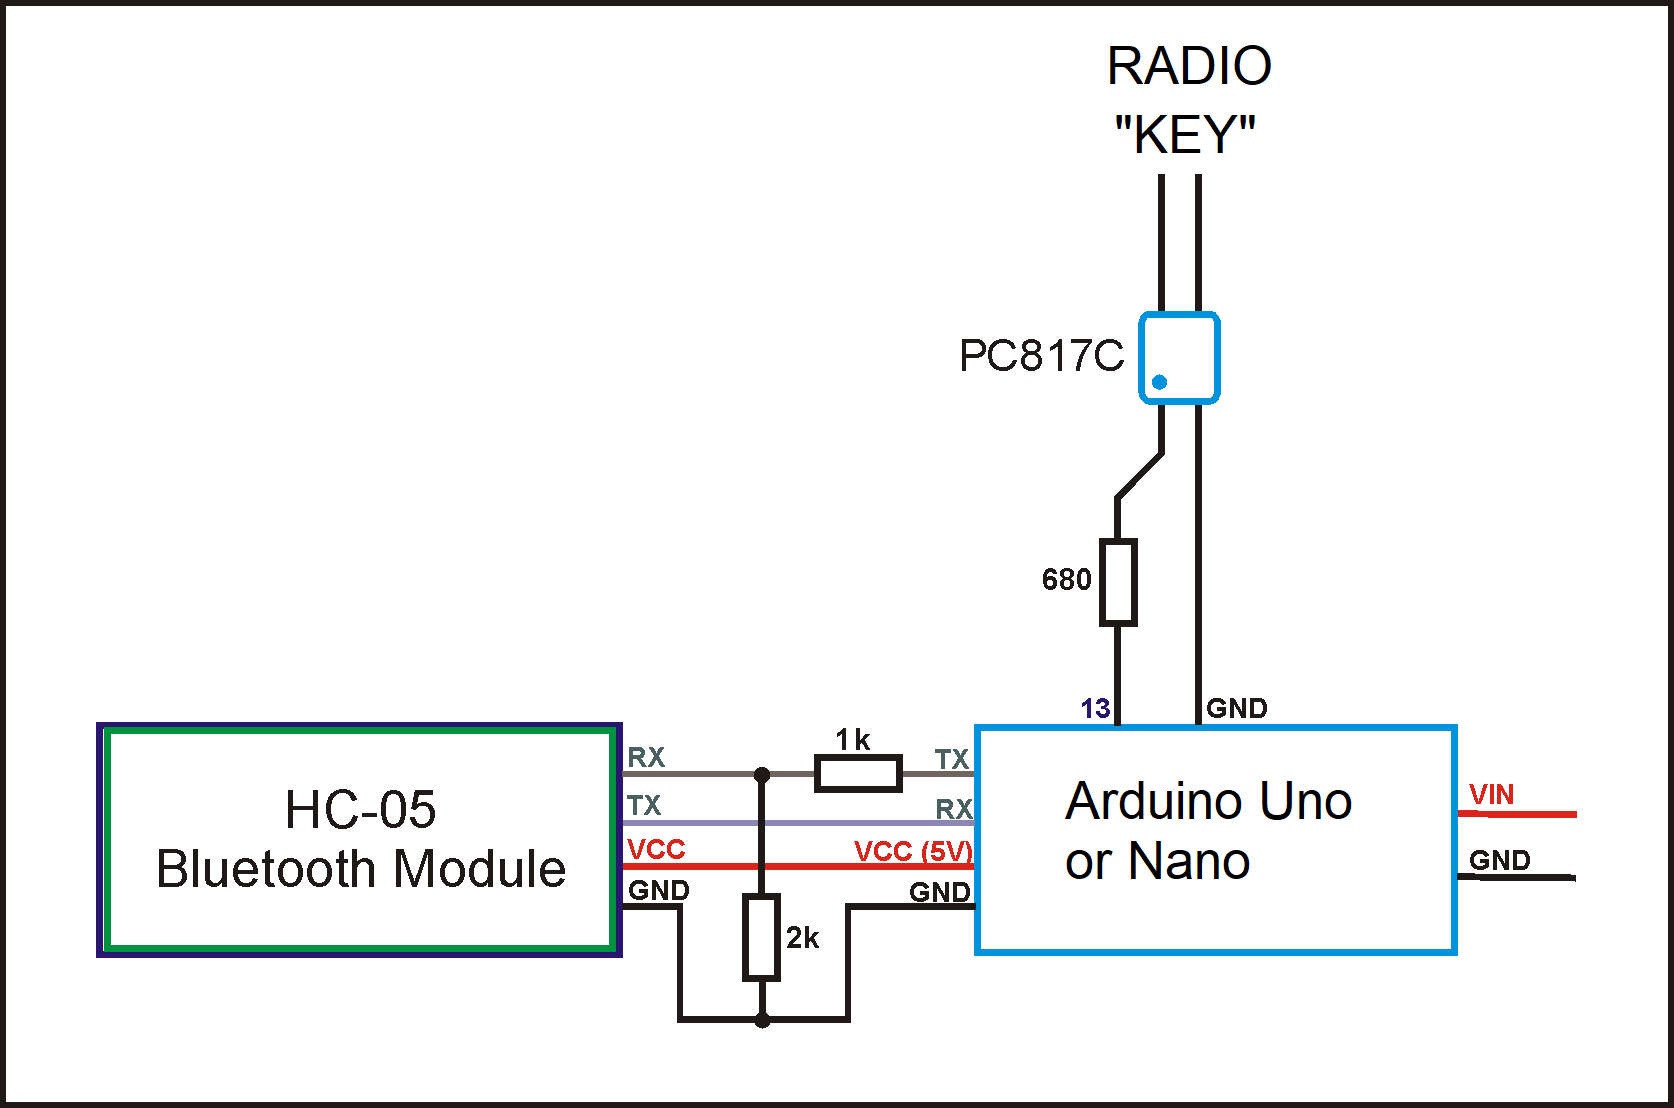

Additionally, a CW sidetone can be enabled on pin 10, for a passive piezo speaker, perhaps during testing or if the keyer is used for practice. Otherwise it is not necessary because there is a sidetone on the radio.


The battery is 2,000 mAh and can be charged with a regular charger for Android phones. The Bluetooth module can be switched off to save energy, for example, when using the paddle.

The image on the left shows how to enable the recording into a text file log. Important: recording stops when you exit the application. Upon returning to the application, if you want to continue recording the log, you must turn on the Data -> Log option again. The name of the file is automatically assigned and contains the date and time.
The following options should also be enabled:
– Auto scroll to end of buffer
– Local echo
– Clear input on send
– Show timestamps
– Keep screen on when connected (maybe not always)
Some of these options are already on by default, but it’s worth checking. They are set practically only once.

For the first test, I saved these messages:
M1: cq cq cq de yu2zz yu2zz ) k
M2: de yu2zz
M3: gd ur 599 5nn qsl? bk
M4: qsl
M5: tnx fair qso cu
M6: 73 * ee
L1: yu2zz
Again, ) is AR, and * is SK.
The contents of individual memories should start with a space, so that words do not stick together if messages are played directly one after the other. The contents of the memories can be changed easily (long tap on the icon), and their displayed names can also be changed, so the operator always sees what is where (see the pictures).
The keyboard itself offers all the usual useful features, such as copy/paste. It is an excellent idea to always type in and copy the other station’s call sign right at the beginning, as it will be needed several times during the QSO.

In addition to passing characters, the Arduino program offers several other functions, such as checking and changing the CW speed. One or more ‘<‘ or ‘>‘ characters can be sent from the phone in sequence. Each of them decreases or increases the speed, respectively, by one standard word per minute. With the ‘%‘ sign, the operator requests only the information about the current speed. The speed can be checked and changed also while the character string is being transmitted over the radio.
If a ‘!‘ is sent from the phone, the transmission currently in progress will stop. The exclamation point must be the first character sent to the keyer after the sequence of characters whose transmission is to be interrupted.
If a string of characters starting with ‘@‘ is sent from the phone, that string of characters will not be sent over the air, but will remain in the saved text file (log), as a note (for example – frequency etc).
If the character ‘~‘ (tilde) is sent from the phone, the last string of characters sent will be repeated. It is practical to put one tilde alone in one of the memories. By the way, the terminal application also has its own History option through which it is possible to return to any previously typed line.
The maximum length of the character string sent from the phone is 50 characters.
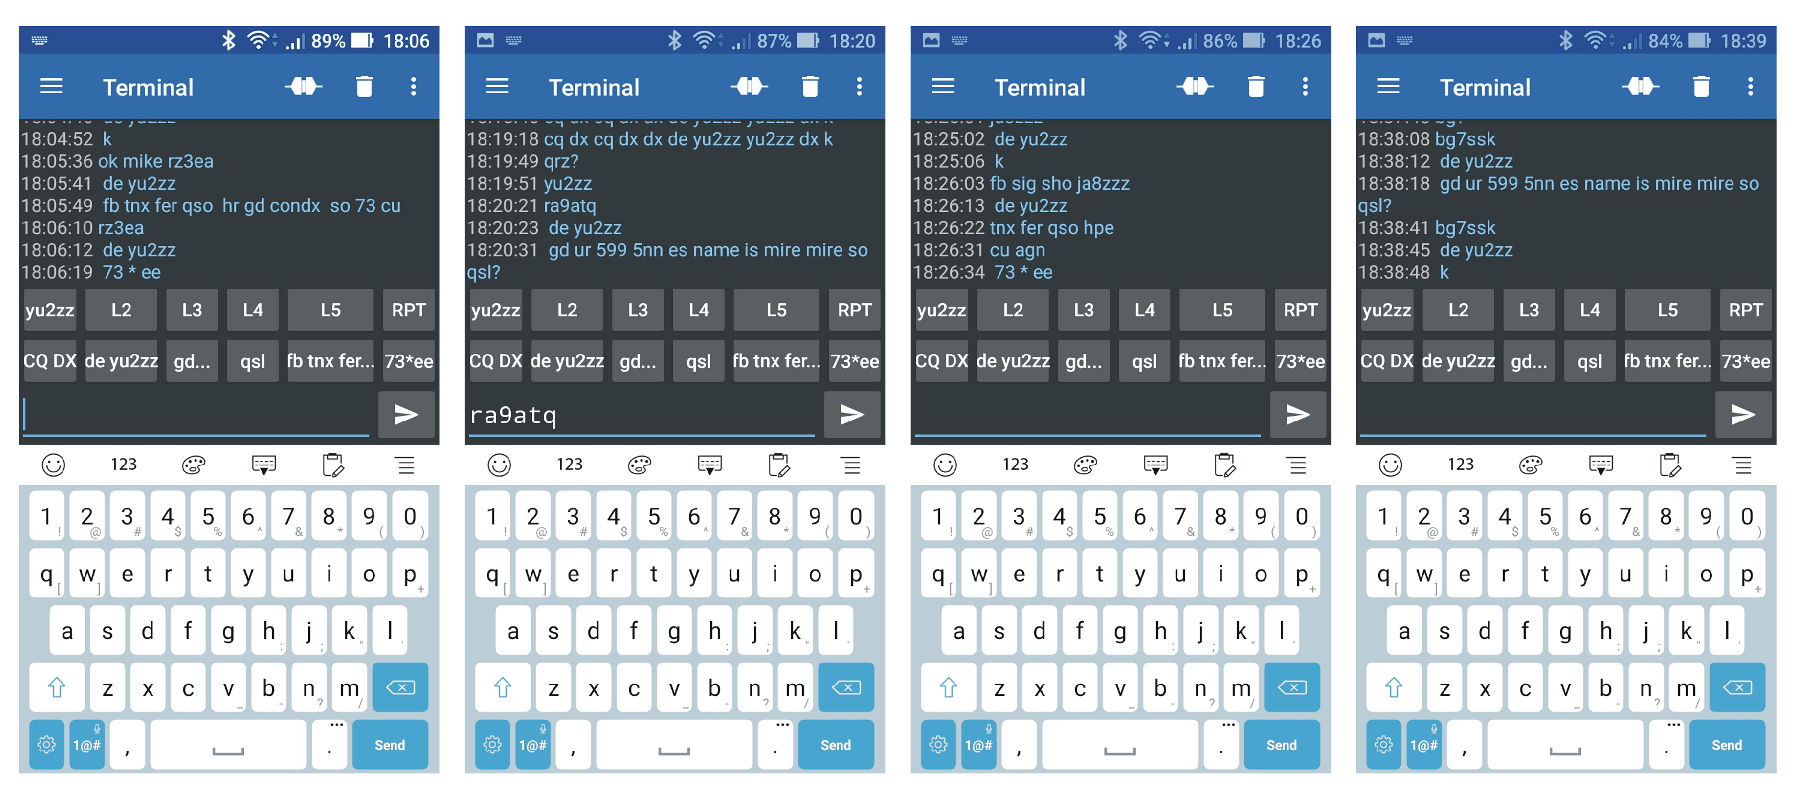
It takes a little time to get used to the new way of making QSOs, but it is not difficult. Younger operators, who are already fast on the phone keyboard, adapt especially quickly. They hardly need messages from the memories.
I cannot type very fast and it took me an hour to start making normal QSOs not only using saved messages, but also adding other operators’ names and custom phrases at around 20 WPM.
Receiving Morse code by ear remains a prerequisite for using this gadget.


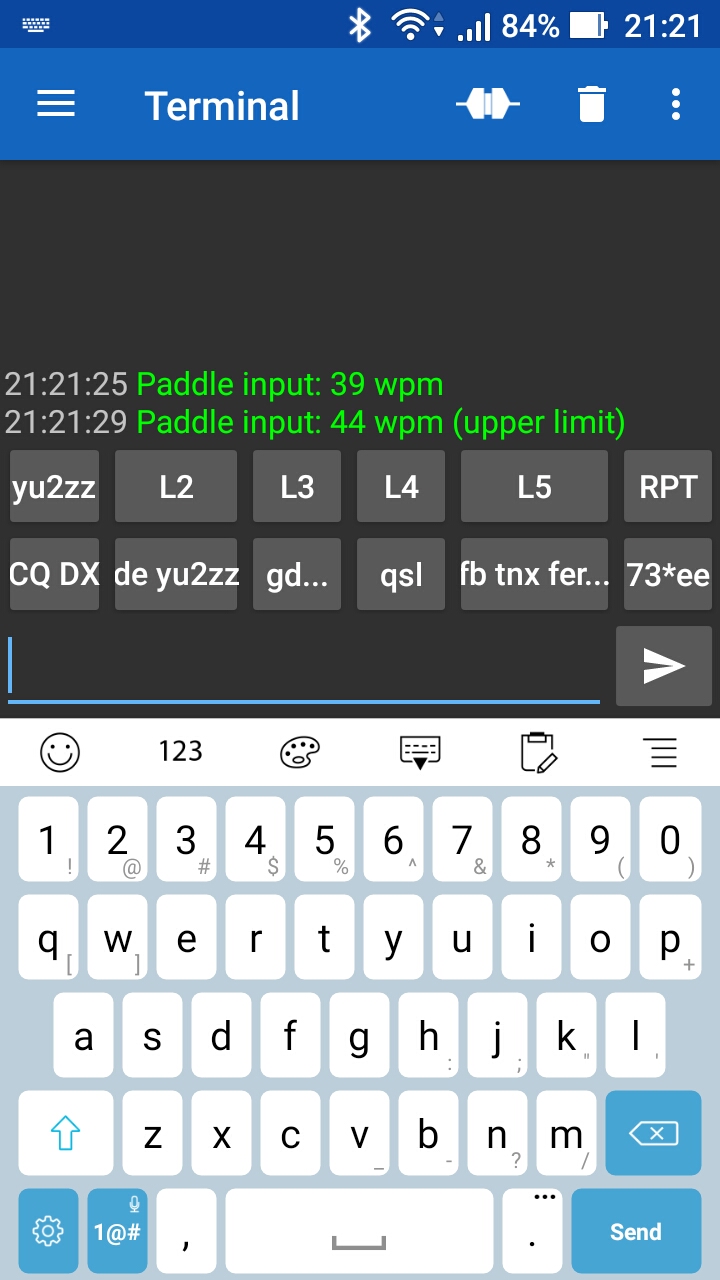
The paddle speed is set independently. Press and hold the green momentary switch, and at the same time press the dot side on the paddle – to increase the speed, or the dash side – to decrease. The entire speed range can be traversed in about 7 seconds. You don’t need a phone for this, but, if it’s already connected, the terminal will (why not) show the newly set paddle speed.
Download YU2ZZ_BT_KEYER_1v0.ino
There is a lot of room for improvement.


Pingback: ‘PIC-Keyer’: 2025 Edition | YU2ZZ ····· Elektronika. Radio. Hobi.
Pingback: Antenna (or whatever) Selector SHIELD for Arduino Uno | YU2ZZ ····· Elektronika. Radio. Hobi.